
26/07/2026
Showing hive scale data on your club website: how to embed it
You have a digital hive scale from Honeylink. The readings arrive reliably in the portal. But that way only you can view the data comfortably.
It does not have to be that way. The scale data can sit directly on your own page - on the club website, on the school website, on the site of your own apiary.
The short version
- Honeylink generates a ready-made embed code in the web portal. You copy it and paste it into your website.
- The display updates by itself. There is nothing to maintain.
- Visitors need no access to your account.
How beekeepers show their scale data today
In practice there are three ways, and two of them are unsatisfying.
The do-it-yourself route. Anyone with the technical skills builds an adapter: the readings pass through a service of their own, which turns them into a chart, and that chart ends up on the website. It works - the self-build community around beelogger.de has been doing it for years. It is still laborious, and it needs maintaining. Anyone with a Honeylink scale does not have to go this way: what is built by hand here, the portal hands over ready-made in a few clicks.
The link that leads away. The normal case. The club page shows a photo of the scale and, below it, a reference to a measurement network such as TrachtNet or to the scale manufacturer's portal. Anyone who wants to see the figures leaves the page. With several scales from different manufacturers at the same apiary, they leave it more than once.
The embed. The data appears directly on your page. The visitor stays where they are. The precondition is that your scale system supplies an embed code. Honeylink does. That is what this article is about.
What an embed actually is
An embed is a window in your page through which the visitor looks at another page. The technical term is iFrame. What matters is the difference from an image: an image is a copy, it shows the state of the day you uploaded it. An embed always shows the current state, because the data is loaded fresh on every page view. There is nothing to maintain.
With Honeylink the portal produces this code for you. You do not need to understand it and you do not need to change anything in it, copy and paste is enough. It is a short block of text and looks roughly like this:
<iframe src="https://share.honeylink.io/embed/..." width="100%" height="400"></iframe>Where this pays off
The teaching apiary. Beginners' courses run over months, but participants only come every few weeks. Between sessions they can follow on the club website what is happening at the apiary. The course leader can pick up on it at the next session.
The school bee club. The club meets once a week; the colony carries on working the other six days. With the weight curve on the school website, pupils can follow from home what is happening at the apiary, and the teacher has something to build on in the next lesson. For the school it is at the same time the visible sign that the club exists - parents and staff see it on the site, not just in the annual report.
Hive sponsorships. Sponsors want to know what their colony is doing. A weight curve on the website answers that without you writing round-robin emails.
The club website itself. Anyone who wants to win members needs a reason for people to come back. A page on which something moves supplies that reason.
Generating the embed code in the portal
The code is created in the web portal at portal.honeylink.io. All you need are your login details. Six steps, and the code is on your clipboard.
1. Sign in. Open portal.honeylink.io and sign in.
2. Go to the Integration area. In the side menu you will find the entry Integration.

3. Create a new view. There you will find the section Geteilte Ansichten (shared views). Click Ansicht erstellen (create view).
4. A single colony or a whole apiary. The portal asks what you want to show: a single hive (Stock) or a whole apiary (Bienenstand). Then you pick which one.
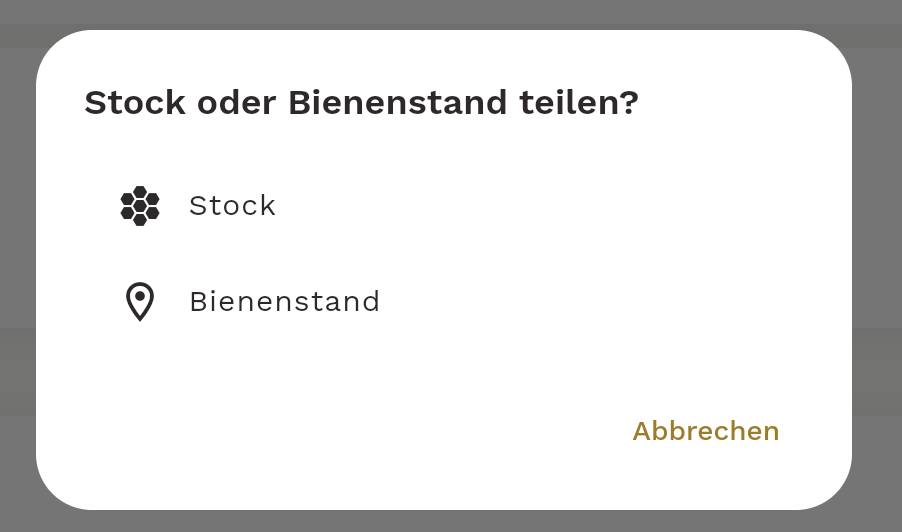
For a club website the apiary is usually the right choice - visitors then see all the scales at the teaching apiary in a single display.
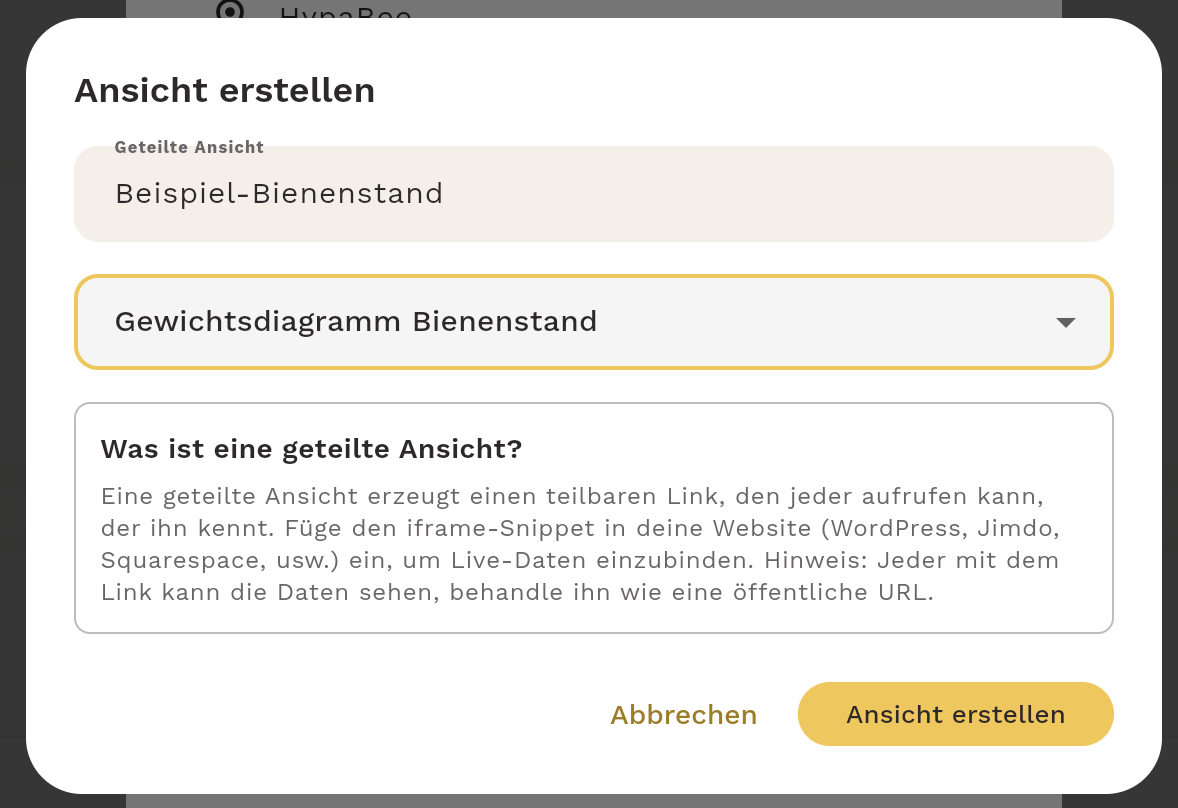
5. Set the name and the display. Give the view a name. It reappears in the code later and helps you tell several views apart. Below that you choose what should be shown, for example the apiary weight chart (Gewichtsdiagramm Bienenstand).
6. Copy the code. The portal shows you the finished code. One click on iframe-Snippet kopieren (copy iframe snippet) puts it on your clipboard.
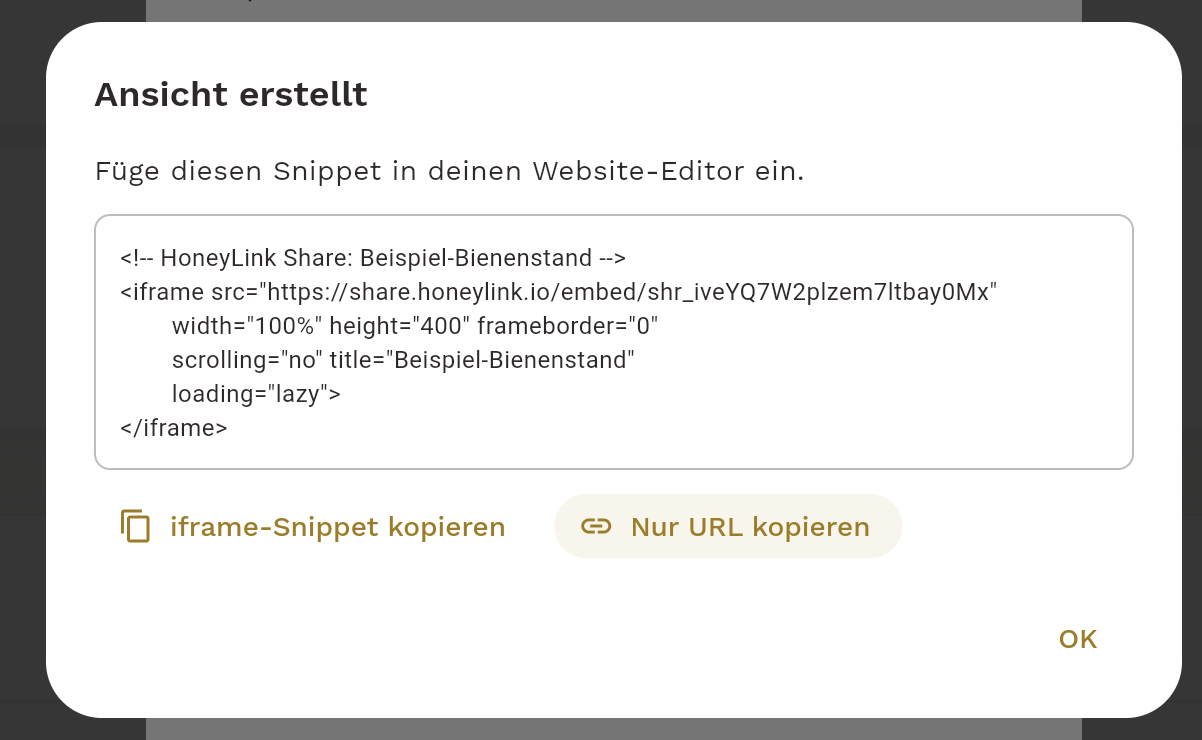
Next to it is Nur URL kopieren (copy URL only). That is the plain address of the view - handy if you want to send the link in a newsletter or share it in the club group. For embedding on the website you take the iframe code.
The code then looks roughly like this:
<iframe src="https://share.honeylink.io/embed/shr_..." width="100%" height="400" frameborder="0" scrolling="no" title="Beispiel-Bienenstand" loading="lazy"> </iframe>You can create several views, for instance one for the teaching apiary and one for the site at the forest edge. Each gets its own code.
Pasting the code into your website
The code is ordinary HTML. It works on any website - hand-written, built with WordPress or made in a website builder.
The only question is whether your site lets you paste HTML. On a hand-built site, always. In a website builder it depends on the provider and sometimes on the plan.
Find the case that applies to you.
A hand-built HTML or PHP page
The simplest case. Many club websites have grown by hand over the years and sit on the server as HTML or PHP files.
- Open the file in which the scale should appear.
- Paste the copied line at the desired place in the text.
- Save the file and upload it to the server.
That is all. No editor, no plugin, no plan that forbids anything.
WordPress, self-hosted
This covers most club websites that sit with an ordinary hosting provider.
- Open the page on which the scale should appear in edit mode.
- Click the plus symbol to insert a new block.
- Search for the "Custom HTML" block.
- Paste the copied code into the field.
- Save and view the page.
Important: do not use the ordinary text block. It shows the code as text instead of running it.
Jimdo
Jimdo has the "Widget/HTML" element for this.
- Pick the place where the scale should appear.
- Add a new element.
- Choose "Widget/HTML".
- Paste the code and save.
The caveat: this element belongs to the "Jimdo Creator" builder. The newer Jimdo Website Builder gives no access to custom code, and the element is not there. If you cannot find an HTML element in your builder, that is why.
IONOS MyWebsite
- Open edit mode and select the area.
- Click Elements and then the HTML module.
- Click Code and paste the text.
- Save and publish.
The caveat: not every MyWebsite package includes the HTML element. If you cannot find it in the element list, that is down to the package.
Other website builders
The procedure is the same everywhere: look for an element called "HTML", "Code" or "Embed". If you cannot find one, your builder cannot do it - then you are left with the link that leads away or a change of provider.
WordPress.com: only on a paid plan
Do not confuse this with the WordPress above. What is meant is the hosted service at wordpress.com, not the software running at your own hosting provider.
There, iframe is on the list of restricted tags. According to the WordPress.com documentation you need a paid plan with hosting features activated - those switch on as soon as you install at least one plugin. Without that, the iframe is stripped on save.
What makes it particularly annoying: the editor shows you a preview in edit mode as though it were working. Only on the published page is the display missing.
If your site is on a free or small WordPress.com plan, you are left with the upgrade, the link that leads away - or a move to your own hosting provider.
When nothing shows up
| What you see | What causes it | What helps |
|---|---|---|
| The code sits on the page as text | You used a text block instead of an HTML block | Delete the block, insert an HTML element |
| Visible in the editor, not on the page | The builder strips iFrames on save | On WordPress.com: needs a paid plan with hosting features, see above |
| No HTML element to be found in the builder | The plan or builder version does not include the feature | Check the plan, otherwise fall back to a link |
| The display appears but is cut off | The height is not enough | Increase the height value, say from 400 to 600 |
| An empty white box | Usually a typo when pasting | Copy the code again, complete and with no space in front of it |
If none of that fits, send us the address of your page. We will take a look.
Who sees your data
A shared view in Honeylink creates a link of its own. Anyone who knows it can open the data - without an account, without signing in, without access to your portal. That is exactly why the embed works: the visitor to your website does not have to sign in anywhere.
The other side of the same coin: the link is public. Treat it like an address that is out on the web - because that is exactly what it becomes as soon as it is embedded on your website. Anyone who passes it on passes on the view of that data.
Your account is untouched by this. A shared view shows what you selected when creating it, and nothing beyond that. Whoever has the link cannot reach your other colonies, your settings or your login details.
And you keep control of it. Every view you create is listed in the portal under Geteilte Ansichten (shared views) - with the name, the type of display, the colony or apiary concerned and the creation date. At the end of the row there is a bin symbol.

One click on it deletes the view. After that nobody reaches the data through that link any more, not even someone who saved it or passed it on. Then remove the element on your website as well, or an empty window will be left standing there.
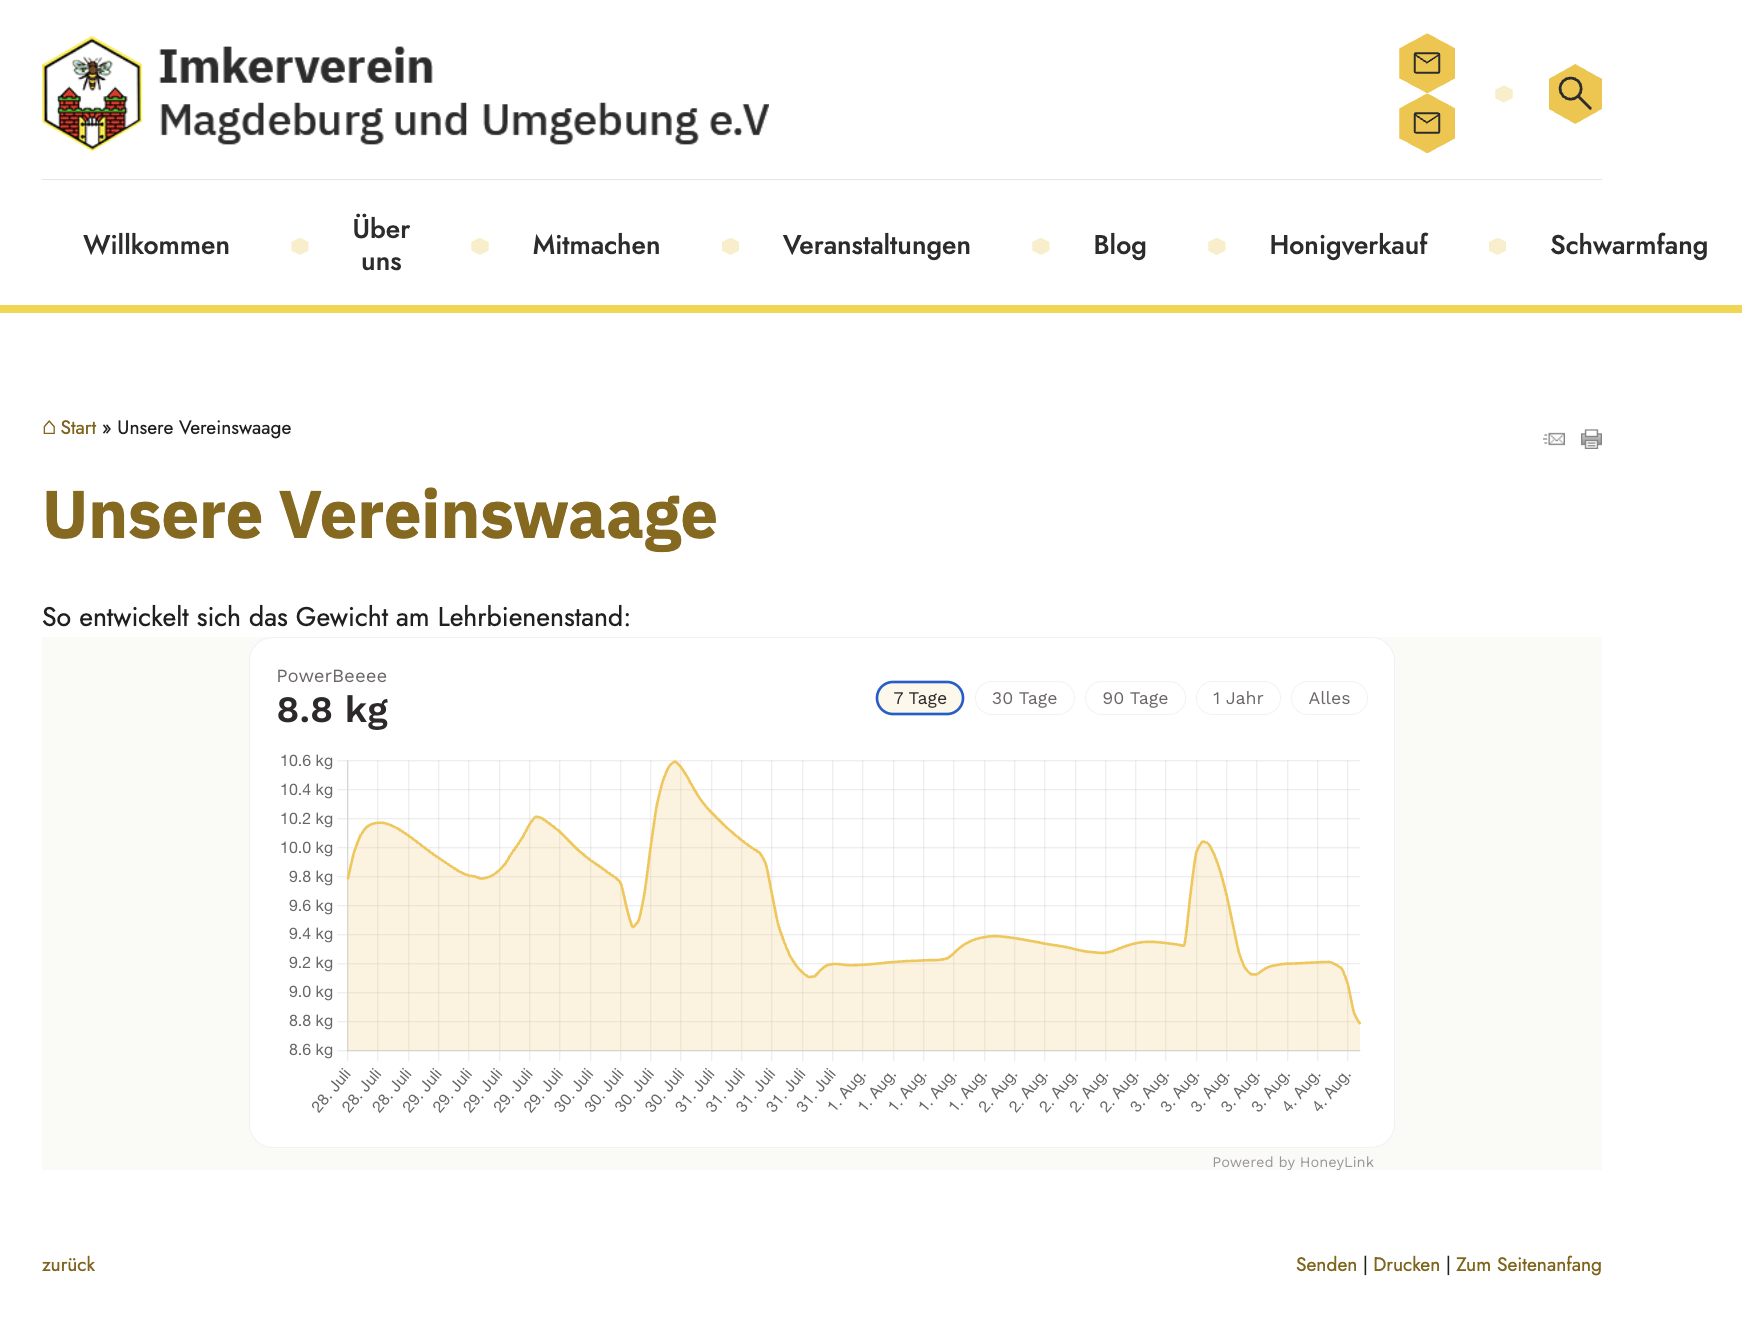
What the result looks like
An example on a club website:
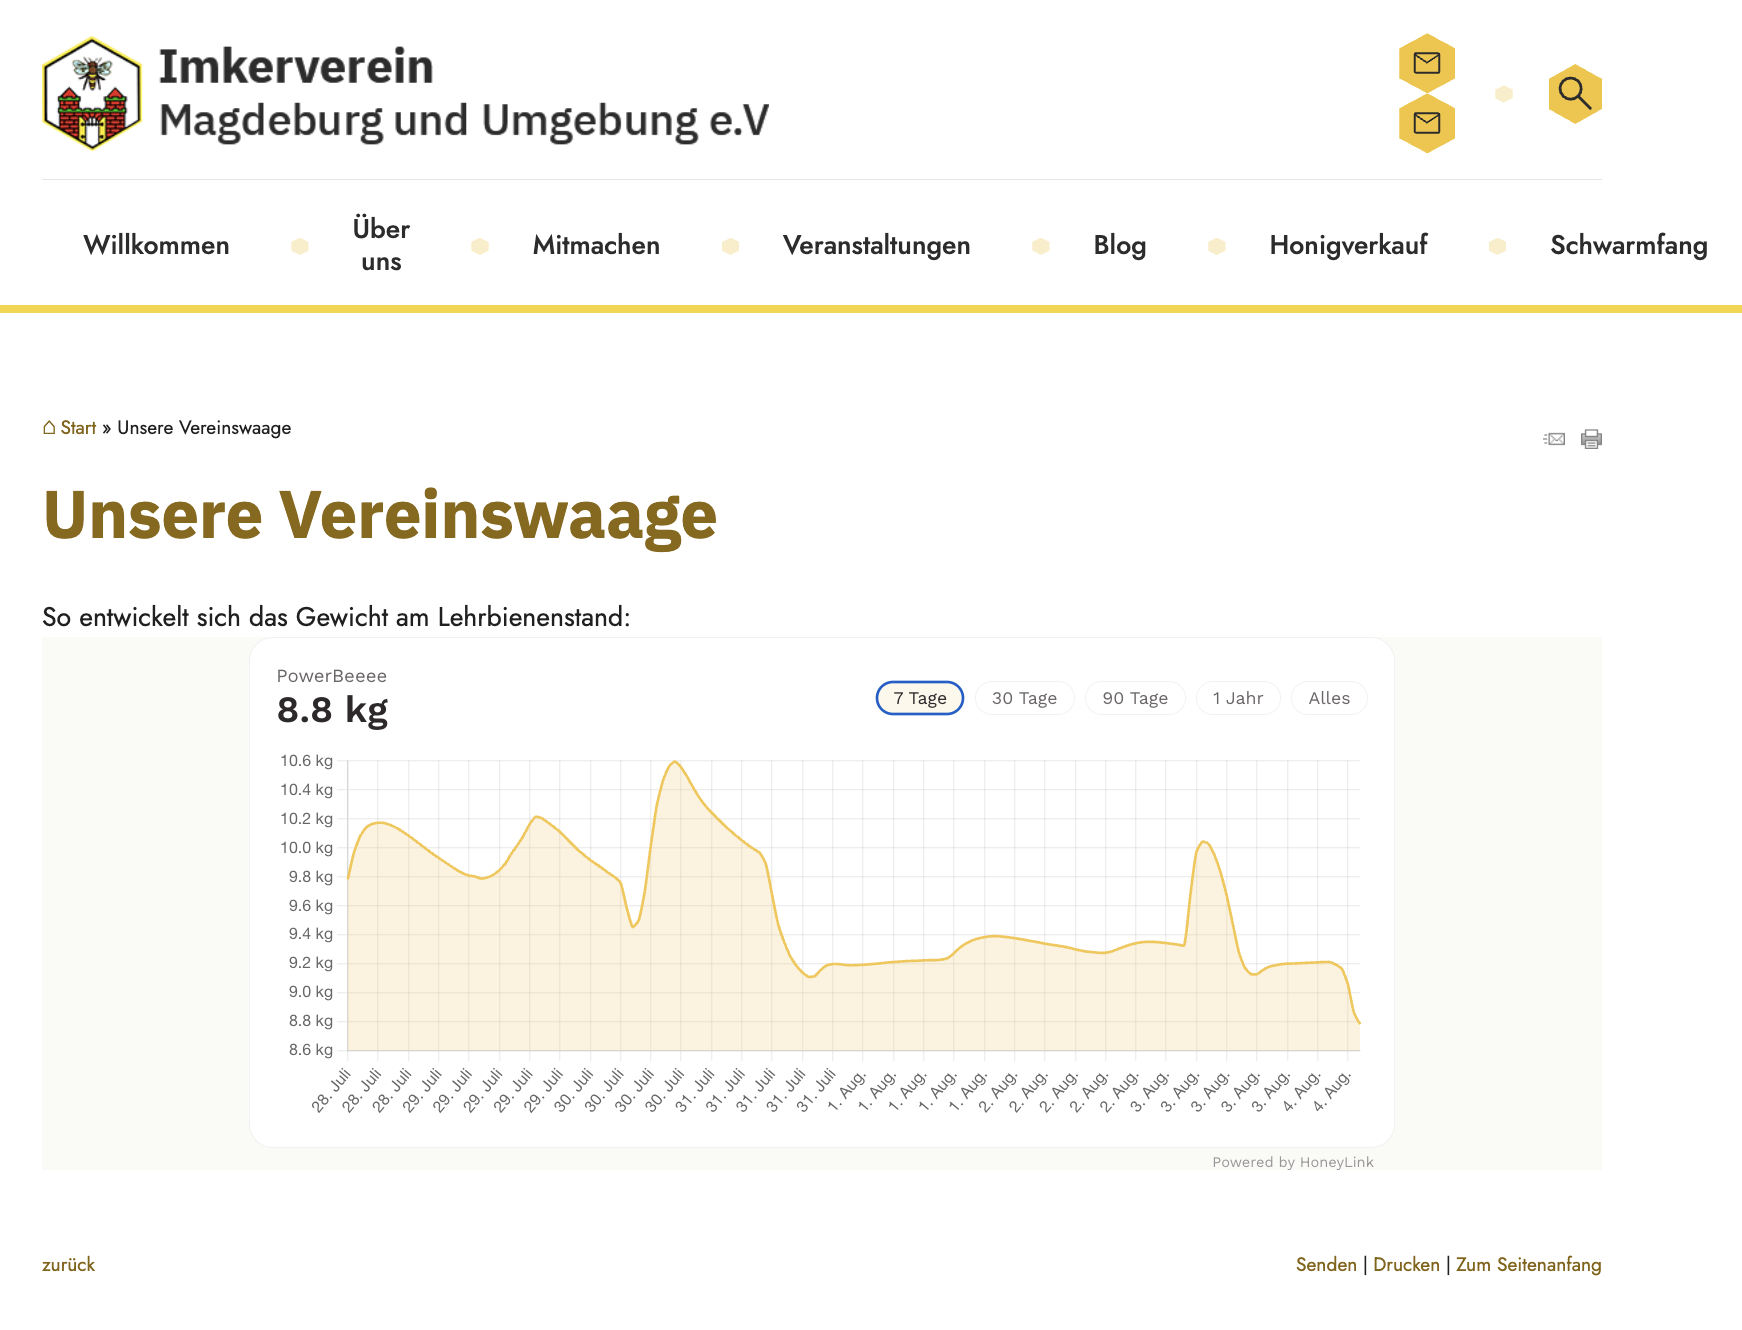
The curve sits in the middle of the page layout, between the header and the foot of the page. The typeface, the colours and the navigation are still those of the club website - only the window with the data comes from outside.
Inside it, the visitor can switch the period, from one week back to the whole history. And stays on your page the entire time.
Frequently asked questions
Do I need to know HTML?
No. You copy one line from the portal and paste it in a place your website builder provides for it. You do not need to understand the code, nor change it.
Can I remove the display again?
Yes. Delete the element on your website and it is gone. If you also want to end access to the data, delete the view in the portal under "Geteilte Ansichten".
Does it work on a phone too?
Yes. Set the width to 100% instead of a fixed value and the display adapts to the screen width. The code from the portal is already set up that way.
What about TrachtNet - does this rule that out?
No. An embed on your own site and taking part in a measurement network are two different things and do not rule each other out.
In short
Most club websites send their visitors to somebody else's page to look at the scale data. That is unnecessary. The embed code from the Honeylink portal brings the data to where your visitors already are.
Check first whether your website builder allows HTML elements. That is the only hurdle, and it is settled in two minutes.
Questions about setting it up? Write to us at info@honeylink.io.